How to Replace Cabin Filter for Cleaner Air in Your Car?

Maintaining a clean cabin environment is essential for a pleasant driving experience. One of the key components in achieving this is the Cabin Filter. This small but vital piece filters out dust, pollen, and other pollutants. Over time, it can become clogged and reduce air quality inside your car. Many drivers forget about it, assuming it won't affect their health.

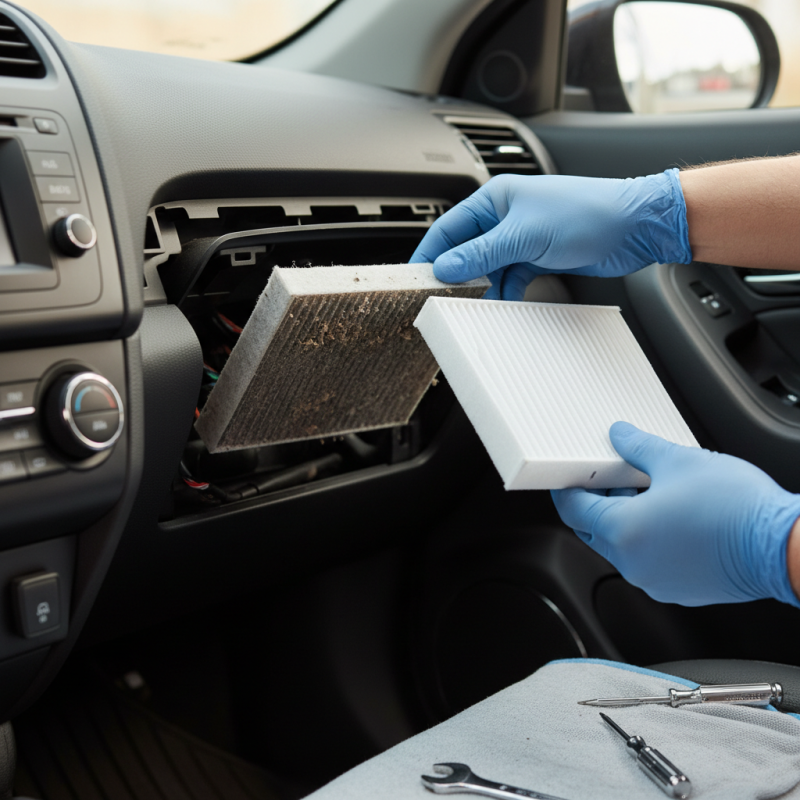
Replacing the Cabin Filter might seem daunting, but it's a straightforward task. You'll need basic tools and a few minutes. Regularly changing this filter can lead to fresher air, enhancing comfort during your travels. It's surprising how impactful clean air can be. Often, we overlook the importance of a simple, clean cabin.

Consider this: when was the last time you checked your Cabin Filter? Neglecting it could lead to unpleasant odors and respiratory issues. Staying proactive can prevent these problems. By taking the time to replace the Cabin Filter, you create a healthier space for everyone in your vehicle.

How to Replace Cabin Filter for Cleaner Air in Your Car?

Understanding the Function of a Cabin Filter in Your Vehicle

The cabin filter plays a crucial role in your vehicle. It filters the air entering the cabin, removing dust, pollen, and other pollutants. According to the American Lung Association, indoor air can be two to five times more polluted than outdoor air. This emphasizes the need for clean air inside your car as you drive.


Regularly replacing your cabin filter can improve air quality. Reports indicate that a clogged filter can reduce airflow and cause unpleasant odors. It is estimated that 40% of drivers neglect this simple maintenance step. Ignoring the cabin filter can affect comfort, especially for allergy sufferers or those with respiratory issues.


Tips:

  • Check your owner's manual for replacement intervals. A good rule of thumb is every 12,000 to 15,000 miles.
  • Pay attention to signs like reduced airflow or strange smells.
  • Also, remember that driving conditions can influence filter replacement needs. For example, urban areas may require more frequent changes due to higher pollution levels.

Signs That Indicate It's Time to Replace Your Cabin Filter

When it comes to the air quality inside your car, the cabin filter plays an essential role. If you notice a musty odor when you turn on the air conditioning, it might be time to replace the cabin filter. This smell often indicates mold or mildew buildup, which can harm your health. Clearing out the filter can help you breathe easy again.

Another sign is reduced airflow from the vents. If you feel weak air circulation, the filter could be clogged. Dust and debris accumulate over time, limiting the air passage. You might also experience increased allergies or respiratory issues while driving. If this happens, it's a clear sign your cabin filter needs attention.

Check the owner’s manual for recommended replacement intervals. Sometimes, it’s easy to forget about small maintenance tasks like this. A quick inspection every few months can go a long way. Don’t wait until the symptoms escalate. Clean air enhances your driving experience and can make longer trips more pleasant.

Step-by-Step Guide to Accessing the Cabin Filter Location

Accessing the cabin filter in your car is quite straightforward. This filter usually resides behind the glove compartment. To get started, open the glove box and remove any items. If it feels tight, don't force it. Instead, locate the small stops on each side of the glove box. Gently push these in, allowing the glove box to drop down fully.

**Tip:** Remember to work slowly and keep an eye on any clips. They can be delicate. Once you have full access, locate the cabin filter cover. It often requires a simple twist or a pull to detach. Check for any debris or dust when removing the old filter. A clogged filter can hinder air quality significantly.

After pulling out the filter, take a moment to compare it with the new one. Mismatched sizes can create problems later. Insert the new filter in the correct orientation; airflow direction is crucial. Finally, reassemble everything in reverse order.

**Tip:** Don’t neglect to double-check your work. A properly fitted glove box can help avoid unnecessary rattling. Tune in to your car’s air quality. If you notice a persistent odor after changing the filter, consider checking additional components like air ducts.

How to Properly Remove the Old Cabin Filter

Replacing the cabin filter in your car is essential for maintaining air quality. A dirty filter can trap dust, pollen, and pollutants. Remove the old filter carefully to avoid spreading debris into the cabin. Most filters are located behind the glove compartment. Open it and locate the tabs that hold it in place. Gently push these tabs to free the compartment.

Once you have access, take out the old filter. Check for any signs of damage or excessive dirt accumulation. Research shows that nearly 60% of drivers neglect this maintenance step. A worn-out filter can reduce airflow and affect your vehicle’s HVAC system. It’s crucial to be aware of these issues and act promptly.

When you handle the old filter, notice its condition. If it's discolored or torn, replace it sooner next time. Installation of the new filter is equally straightforward. Ensure it is oriented correctly. Many filters have arrows indicating airflow direction. This small detail impacts the effectiveness of the filter. Even with clear instructions, mistakes can happen, so double-check your work.

Installing the New Cabin Filter and Finalizing the Process

Installing a new cabin filter is a straightforward but often overlooked task. It helps reduce allergens and improve air quality in your car. Begin by locating the cabin filter compartment. This is often found behind the glove box or under the dashboard. You may need to remove a few screws or fasteners to access it. Don’t rush; take your time to avoid damaging any components.

Once you have the old filter out, it’s time to install the new one. Pay attention to the orientation of the filter. There is usually an arrow indicating airflow direction. Installing it incorrectly can lead to poor performance. Sometimes, the new filter may not fit perfectly, leaving gaps. If you notice this, it’s wise to double-check the model and specifications.

After placing the new filter, reassemble the compartment carefully. Ensure all screws are tightened and that nothing is left loose. It’s easy to overlook this step in a hurry. Also, remember to check the cabin air flow after installation. If it seems off, the filter might not be seated correctly. Small mistakes can lead to bigger issues down the road. Taking a moment to reflect can save you future headaches.

How to Replace Cabin Filter for Cleaner Air in Your Car?

Step Description Tools Required Estimated Time
1 Locate the cabin filter access panel. None 5 minutes
2 Remove the access panel by unscrewing or unclipping. Screwdriver or clips tool 10 minutes
3 Take out the old cabin filter. None 5 minutes
4 Insert the new cabin filter into the slot. None 5 minutes
5 Reattach the access panel. Screwdriver or clips tool 10 minutes
6 Test the air conditioning system. None 5 minutes

Article Source: