Why Choose Drip Tape Fittings for Irrigation?
Agriculture faces a measurable water challenge. The Food and Agriculture Organization reports that farming accounts for roughly 70% of global freshwater withdrawals. In this environment, irrigation hardware deserves careful attention. Drip Tape Fittings connect thin-walled tape to headers, valves, filters, and field laterals. A small connection can influence an entire planting row.
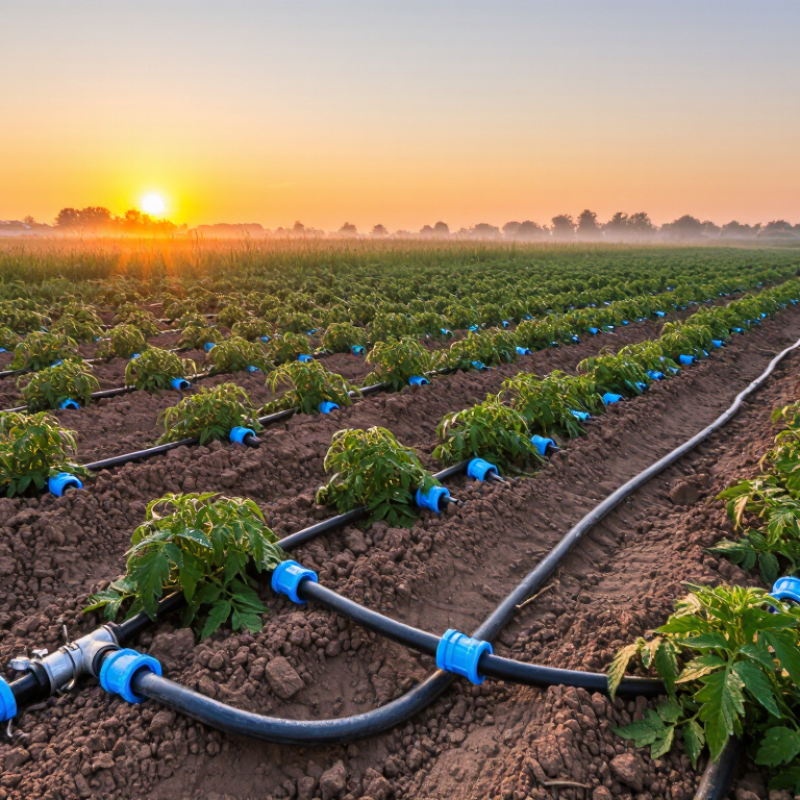
The USDA Natural Resources Conservation Service identifies microirrigation as a high-efficiency method when designed, installed, and maintained correctly. The Irrigation Association also emphasizes filtration, pressure regulation, and uniform application as essential performance factors. Drip Tape Fittings support these requirements by helping maintain stable water delivery near plant roots. Picture a tomato field at sunrise: water should emerge steadily, not spray from a loose connector onto dry soil.
The details matter.
A reliable fitting can reduce leaks, simplify repairs, and shorten installation time. However, fittings alone cannot solve poor irrigation design. Incorrect sizing, weak clamps, clogged filters, or excessive pressure may still create uneven watering. This is where practical experience matters. Field conditions are rarely perfect, and even a well-specified system may need adjustment after installation. The FAO AQUASTAT database repeatedly highlights the importance of improving agricultural water productivity, but efficiency claims should never be accepted without local testing.
Why choose Drip Tape Fittings? The answer involves control, maintenance, compatibility, and long-term reliability. This guide examines those factors through established irrigation principles, manufacturer specifications, and realistic field considerations. Some conclusions may require reconsideration. Water savings are possible, but only when every connection performs as intended.
What Are Drip Tape Fittings and How Do They Work?
Drip tape fittings are the small connection parts that make a low-pressure irrigation system work. They include takeoffs, barbed connectors, valves, end closures, and repair couplings. A takeoff usually enters a supply pipe through a punched hole and sealing gasket. Its barbed stem grips the tape from inside. A nut or clamp then holds the joint firmly.
Water travels through the mainline and enters the tape through each fitting. Pressure must remain controlled. Filtration is also essential because fine sand can block narrow passages. FAO AQUASTAT estimates that agriculture uses roughly 70% of global freshwater withdrawals. USDA NRCS guidance commonly places well-managed drip application efficiency near 90–95%. Those figures are useful, but they depend on installation quality, pressure control, and maintenance.
The fitting is often the system’s weakest point. A joint may look tight while leaking beneath wet soil. During field inspections, check for soft spots, spray, and uneven emitter flow. Choose fittings that match the tape’s inside diameter and wall thickness. Avoid forcing mismatched barbs. It can damage the tape. End closures should permit flushing, because trapped sediment gradually reduces performance. I would not treat a high efficiency rating as a guarantee. A careless punch, stretched tape, or missing filter can quickly waste water and reduce crop uniformity.
How Drip Tape Fittings Connect and Control Irrigation Lines
Drip tape fittings create the working connections behind a reliable irrigation system. They join tape to supply lines, split water into separate rows, and close unused outlets. A well-fitted connection should feel firm, not forced. During installation, cleanly cut the tape and push it evenly over the fitting barb. A small clamp or locking nut can prevent leaks when pressure changes.
Control begins at the connection point. Valves and takeoff fittings help growers open selected rows, isolate damaged sections, or adjust water delivery for different crops. This makes irrigation more precise than simply running one long line. Check the tape layout before tightening anything. Uneven spacing may leave dry soil near the row ends. That mistake is easy to miss.
Tips: Keep fittings away from sharp stones and heavy foot traffic. Flush the supply line before connecting fresh tape. Inspect joints after the first irrigation cycle, especially around bends. Water droplets often reveal a loose connection before plants show stress. Replace cracked fittings instead of sealing them temporarily. Temporary fixes sometimes become permanent problems. In my experience, hand-tightening is safer than using excessive force, although the correct pressure depends on the fitting design. Record which rows receive weaker flow, then review the layout after several watering cycles. Soil, slope, and pressure can change performance, so even a carefully planned system may need adjustment.
Key Benefits of Using Drip Tape Fittings
Drip tape fittings make low-pressure irrigation easier to control in vegetable beds, nurseries, and small fields. They connect tape to supply lines, valves, and end closures with fewer complicated tools. A secure fitting helps maintain steady water flow along each row. This can reduce dry patches near the inlet and oversupply at the beginning. Installation is also quicker when fittings match the tape diameter and operating pressure.
Tips: Check the tape size before ordering connectors. Push barbed fittings firmly into clean, straight tape. Use a small filter upstream, because grit can block narrow passages. After installation, run water briefly and inspect every joint. A loose connection often shows as a small spray, not a dramatic leak. Replace damaged tape instead of forcing a fitting into it.
Drip tape fittings also support flexible field layouts. You can add a valve for separate watering zones or close unused rows with end fittings. Their simple design makes repairs easier during busy growing periods. However, they are not maintenance-free. Heat, sunlight, pressure changes, and rough handling can shorten service life. I have found that careful alignment matters more than tightening force. Over-tightening may deform the tape and create another leak. Some layouts still need better pressure regulation, so fittings alone cannot guarantee uniform irrigation.
How to Select the Right Drip Tape Fittings
Why Choose Drip Tape Fittings for Irrigation?
How to Select the Right Drip Tape Fittings
Choosing the correct drip tape fitting starts with the tape itself. Check its outside diameter, wall thickness, and operating pressure before buying connectors. A fitting that feels tight may still leak under pressure. Measure carefully.
Barbed fittings work well for simple installations and firm soil conditions. Compression fittings are easier to adjust and may reduce damage during seasonal maintenance. For thin-wall tape, avoid forcing a large barb into the opening. It can stretch the tape and create a slow leak. Select connectors made for irrigation use, with smooth edges and a reliable gasket when required.
Think about the whole system, not only the connection. Mainline pressure, filter quality, water temperature, and fertilizer use can affect fitting life. In field checks, I look for wet soil around joints after the system runs for ten minutes. That small test often reveals problems early. Flush the lines before installation, too. Tiny particles can prevent a valve or connector from sealing properly.
UV resistance matters in exposed fields. Buried fittings need strength against soil movement and repeated pressure changes. I once assumed a thicker fitting was always better; it was not. Its rigid body stressed the tape during movement. Compatibility is more important than appearance. When specifications are unclear, test a short section before installing hundreds of meters.
Why Choose Drip Tape Fittings for Irrigation?
How to Select the Right Drip Tape Fittings
Drip tape fittings should match the tape’s nominal outside diameter to create a secure, leak-resistant connection. Common drip tape sizes include 16 mm, 17 mm, and 22 mm. Always verify the tape diameter, fitting inlet size, operating pressure, filtration requirements, and connection style before installation.
Installation and Maintenance Considerations for Drip Tape Fittings
Drip tape fittings support precise water delivery when installation is controlled. The FAO AQUASTAT database reports that agriculture accounts for about 70% of global freshwater withdrawals. This pressure makes efficient distribution increasingly important. Properly fitted connectors reduce leakage and keep water near the root zone. They also allow damaged tape sections to be replaced without removing an entire irrigation line.
Installation details often decide system performance. Cut tape cleanly, without crushing its opening. Insert the fitting fully, then check the gasket or barb for alignment. Filters should match the emitter’s flow requirements and local water quality. The Irrigation Association recommends filtration and pressure regulation because suspended particles and excessive pressure can damage drip components. A pressure gauge near the inlet reveals problems that are otherwise easy to miss. Small leaks matter. One loose connection can create a wet patch, while distant plants remain dry.
Maintenance requires regular inspection during operation. Walk the rows and look for split tape, clogged outlets, and uneven wetting. Flush lines at the ends, especially after installation or repairs. The U.S. Environmental Protection Agency’s WaterSense guidance identifies drip irrigation as highly efficient when designed and maintained correctly, but efficiency is not automatic. Seasonal temperature changes may loosen fittings. Rodents, tools, and foot traffic can also cause failures. In practice, I have found that quick visual checks are useful, yet they can miss underground seepage. A simple pressure test and flow comparison provide stronger evidence. It is tempting to tighten every connector aggressively, but over-tightening may deform the tape and create another leak.
Why Choose Drip Tape Fittings for Irrigation? - Installation and Maintenance Considerations for Drip Tape Fittings
| Category | Consideration | Recommended Practice or Typical Value | Why It Matters |
|---|---|---|---|
| System Design | Water-use efficiency | Drip irrigation can typically achieve about 80–95% application efficiency when properly designed and maintained. | Water is delivered close to the crop root zone, reducing evaporation, runoff, and unnecessary wetting. |
| Fitting Selection | Compatibility with drip tape | Match the fitting to the tape’s measured outside diameter, wall thickness, outlet size, and connection type. | Correct sizing helps prevent leaks, tape deformation, and accidental disconnection. |
| Fitting Selection | Material choice | Use UV-resistant irrigation-grade polyethylene or polypropylene components suitable for the operating pressure and water quality. | Appropriate materials improve service life and resistance to sunlight, moisture, and common agricultural chemicals. |
| Installation | Cutting the tape | Make a clean, square cut with a sharp blade or tube cutter; remove dirt and burrs before inserting the fitting. | A straight, clean edge allows the sealing area to sit evenly and reduces the chance of leakage. |
| Installation | Insertion depth | Insert the tape fully into the fitting’s sealing section according to the fitting design; do not force or twist the tape excessively. | Insufficient insertion may cause pull-out, while excessive force can damage the tape or fitting seal. |
| Installation | Header connection | Install a compatible take-off, grommet, or start connector and verify that the connection is perpendicular and mechanically supported. | Proper alignment limits stress on the tape and helps maintain a watertight joint. |
| Pressure Control | Operating pressure | Operate within the tape and fitting manufacturer’s pressure limits; many thin-wall drip tapes require relatively low pressure, often around 0.5–1.0 bar (7–15 psi). | Excessive pressure can split tape, open seals, or cause fittings to separate. |
| Filtration | Filter selection | Use filtration appropriate to the emitter flow path; common drip systems use approximately 120–200 mesh filtration, depending on emitter specifications and water quality. | Filtration reduces clogging at emitters and limits debris accumulation around fittings and valves. |
| Flushing | Initial and routine flushing | Flush mainlines before connecting tape, then flush tape ends at startup and periodically during the growing season until discharge runs clear. | Flushing removes plastic particles, soil, algae, and installation debris that can restrict flow. |
| Leak Inspection | Visual and pressure checks | Inspect all connections after pressurization and walk the lines regularly for spraying water, wet spots, disconnected fittings, or uneven crop growth. | Early detection reduces water loss, soil erosion, and crop stress. |
| Maintenance | Fitting replacement | Replace cracked, distorted, brittle, or repeatedly leaking fittings rather than overtightening or reusing damaged components. | Damaged fittings rarely maintain a reliable seal and may fail suddenly under pressure. |
| Chemical Management | Fertilizer and treatment compatibility | Confirm chemical compatibility, follow label directions, and flush the system with clean water after fertigation or approved treatments. | Residues and incompatible concentrations can accelerate clogging, swelling, or material degradation. |
| Seasonal Storage | End-of-season handling | Drain the system, remove sediment, protect reusable fittings from prolonged sunlight, and store components in a cool, dry place. | Dry, shaded storage helps reduce UV aging, freezing damage, and contamination between seasons. |
| Sustainability | Material recovery | Separate used polyethylene tape and plastic fittings from soil and organic waste, then use an agricultural plastics recycling program where available. | Clean separation improves the likelihood of recycling and reduces plastic waste in fields and waterways. |